You’ve got a new temperature monitoring system. You’ve bought all the sensors. You’ve set up the cloud dashboard. But then nothing works right. The sensors keep losing connection. Alerts are spot on. Data drops out randomly.
Gateway placement is one of those things that sounds boring but actually makes the biggest difference in how well your entire wireless monitoring system works. Get it wrong, and you’ll waste money troubleshooting problems that don’t exist. Get it right, and your system runs like a dream for years.
Let me show you how to get it right.
Why Gateway Placement Actually Matters (More Than You Think)
Before we get into the checklist, let’s talk about why this even matters in the first place.
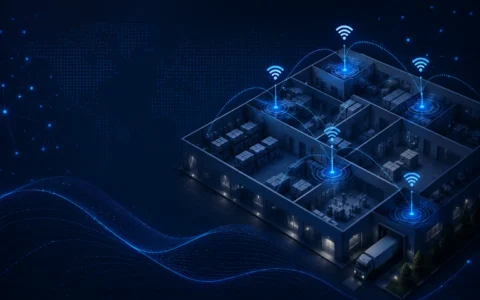
Your wireless temperature-monitoring gateway is the bridge between your sensors and your data. Every temperature reading, every humidity measurement, every alert that matters, all have to flow through that gateway.
If your gateway sits in a bad spot, that bridge gets weak. Signals get blocked. Data packets get lost. You get false alarms. Real problems go unnoticed.
But here’s the thing: most people just put their gateway wherever it is convenient. On a shelf near the office. In a closet because it looks neat. In the back corner, because nobody sees it there.
That’s backwards thinking.
Your gateway placement should be strategic. It should be based on:
- Where your sensors actually are
- What walls and obstacles are in between
- How far the signal needs to travel
- What interference might exist in that area
When you get the placement right, everything changes. Your signals get stronger. Alerts come through on time. Battery life on sensors improves. Your whole wireless monitoring network becomes more reliable.
And when you’re talking about monitoring temperatures in a pharmacy, a restaurant cold room, or a medical refrigerator, reliability isn’t optional. It’s everything.
How Gateway Signal Works
You don’t need to be an engineer to understand this. Just know that your wireless gateway sends and receives signals over the air, kind of like how your WiFi router works.
The signal travels in all directions, but it travels differently depending on what’s in the way:
- Open space? Signal travels far and stays strong
- Walls and metal? The signal gets blocked or weakened
- Concrete and brick? Signal struggles to penetrate
- Water and dense materials? The signal basically bounces off
Your job is to place the gateway somewhere that lets those signals reach your sensors without fighting too hard.
Plumsense gateways like the M500/M500L and M700 are built to handle real-world installations with good range and penetration. But even the best gateway won’t perform well stuck in the wrong spot.
Your 5-Step Gateway Placement Checklist
Here’s how to get it right:
Step 1: Map Out Your Monitoring Area First
Before you touch the gateway, you need to know exactly where your sensors will be.
Walk around your facility and mark where sensors need to go:
- Which refrigerators need monitoring?
- Which storage areas, rooms, or zones?
- How far apart are these locations?
- What’s the maximum distance the signal needs to travel?
Write it down. Actually write it down. Don’t just guess.
If you’re monitoring multiple locations like a restaurant chain with 15 locations, or a pharmacy with separate storage areas, you might need multiple gateways. That’s fine. One gateway typically covers 50-100 meters in open space, less if there are walls.
For something like a 900 MHz wireless monitoring system (which Plumsense uses with the i500 repeater), range is usually better than WiFi, especially through walls. But distance still matters.
Step 2: Choose Central Location, Not Convenient Location
Your instinct will be to put the gateway near your computer or in the office. Don’t do that.
Instead, put it somewhere central to where your sensors actually are.
If you’re monitoring refrigerators spread across a warehouse, the gateway should be roughly in the middle of those refrigerators. Not in the corner. Not in the office.
Why? Because the signal travels in all directions from your gateway. By putting it in the center, you give every sensor roughly an equal distance to cover. You’re not making some sensors reach across the whole facility while others are right next to it.
This is especially important if you’re running a temperature monitoring system for a multi-location business or a large facility. The gateway becomes the heart of your operation. Location matters.
Step 3: Get Off the Ground (But Not Too High)
Here’s something most people get wrong: putting the gateway too low.
A gateway sitting on the floor or under a desk is fighting gravity, obstacles, and everything else. Put it up higher:
- Ideal height: 1.5 to 2.5 meters (about 5-8 feet) above ground
- Why? Better signal spread. Clears obstacles like equipment and inventory
But don’t put it on the roof or way up high. That’s actually worse. You want it roughly at the height where most of your sensors will be.
If your sensors are in refrigerators and freezers (like in a pharmacy storing vaccines, or a restaurant managing cold chain temperature control), the gateway should be at roughly that height too. When the gateway and sensors are at similar heights, the signal travels more directly and with better strength.
Step 4: Avoid Obstacles and Interference
This is the technical part, but it’s not complicated.
Keep your gateway away from:
- Metal cabinets and equipment (they block everything)
- Thick walls, especially concrete
- Wet areas or rooms with lots of water or moisture
- Electrical equipment running nearby
- Microwaves and medical devices (they create interference)
Good spots for a gateway:
- Open hallways or central areas
- Near windows (not in direct sun, but open air helps)
- Elevated shelves or wall mounts in central locations
- Anywhere that lets the signal spread evenly
Think about this logically: if you were trying to throw a ball to reach multiple people in a room, where would you stand? Probably somewhere in the middle, without obstacles blocking you. Same idea with your gateway.
For Plumsense customers using the M700 LoRaWAN gateway, this placement strategy is especially important because LoRa operates at a specific frequency. Good placement maximizes that long-range capability you paid for.
Step 5: Test Before You Finalize
Once you’ve placed your gateway, test it.
Don’t just assume it works. Actually check:
- Do all your sensors connect reliably?
- Are alerts coming through on time?
- Is the signal strength decent in all areas?
- Did you get any disconnection logs in your first week?
Most systems let you see signal strength information. Use it. If some sensors are showing weak signals, move the gateway slightly. Repositioning it just a meter or two can sometimes make a huge difference.
If you’re monitoring temperature across multiple locations, this becomes even more critical. A weak connection at one site means you might miss a temperature excursion that costs you time and money.
Run your monitoring system for at least a few days before finalizing the placement. Real-world testing beats guessing every time.
Gateway Placement for Different Industries
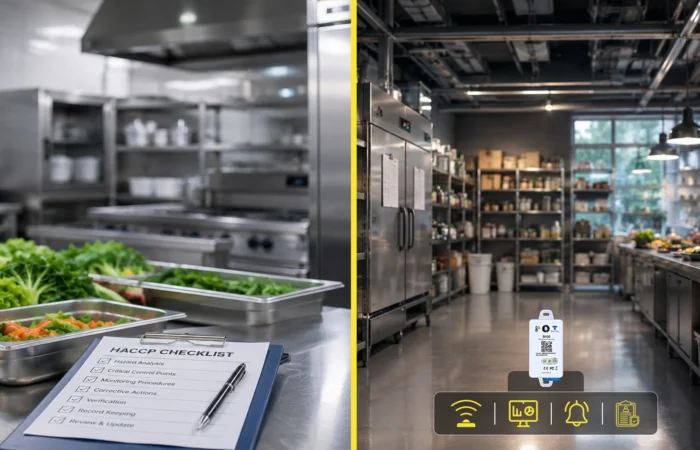
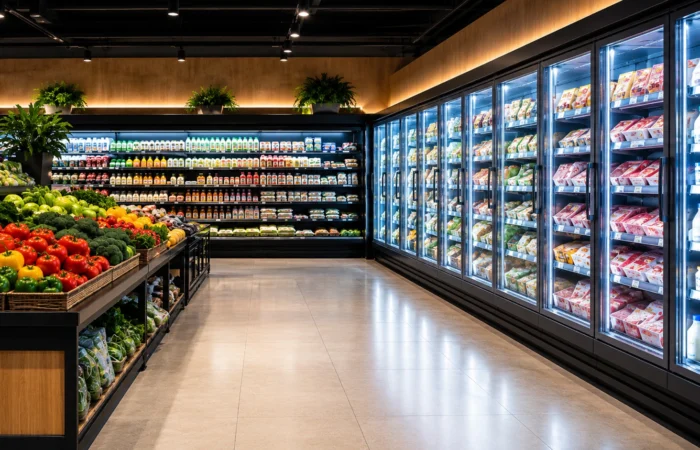
Restaurants & Food Service
Your gateway should be central to all your cold storage areas, walk-in coolers, reach-in refrigerators, and prep areas. This is where your food temperature monitoring systems actually matter for food safety compliance.
When you’re storing ingredients at the right temperature, everything depends on knowing when something goes wrong. A gateway stuck in the office won’t catch a slow temperature climb in the back freezer.
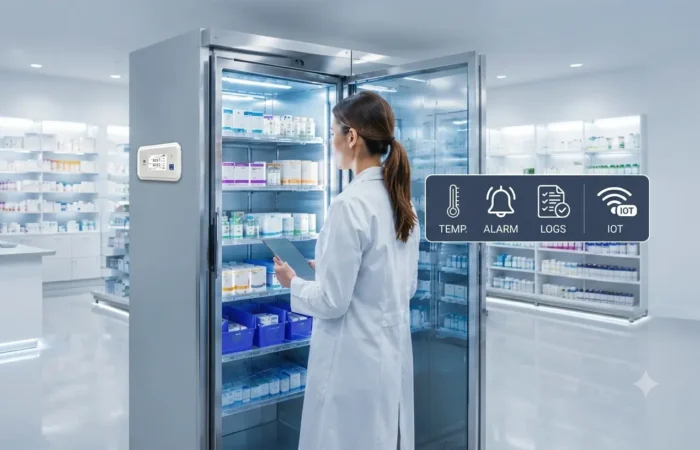
Pharmacies & Healthcare
If you’re storing vaccines or medications, the gateway should have a clear line of sight to those storage areas. Medical refrigerators need reliable monitoring, and placement directly affects your data integrity.
This is especially critical if you’re dealing with regulatory compliance like GMP or FDA requirements. Your monitoring system needs to work perfectly. Placement makes that happen.
Warehouses & Distribution Centers
Central placement near your temperature-sensitive inventory is key. If you’re using a multi-location monitoring system for distribution across regions, each location gets its own gateway in the same strategic position.
The M500/M500L gateway from Plumsense is built for exactly these kinds of installations: reliable, flexible, made in the USA.
Manufacturing & Clean Rooms
Keep the gateway away from production equipment and interference. Placement affects the reliability of your entire monitoring network, which affects your product quality and regulatory compliance.
Common Gateway Placement Mistakes (And How to Fix Them)
Mistake #1: Putting it in a closet because it looks neater
- Fix: Find a central location that’s open and accessible
Mistake #2: Placing it too far from sensors
- Fix: Calculate distances first, and place the gateway centrally
Mistake #3: Ignoring obstacles and walls
- Fix: Walk the path the signal needs to travel, check for interference sources
Mistake #4: Setting and forgetting
- Fix: Test for the first week, monitor signal strength regularly
Mistake #5: Not considering future expansion
- Fix: Place the gateway where you might add sensors later
Why Plumsense Makes Gateway Placement Easier
When you’re choosing a wireless monitoring system, the gateway matters. Systems like Plumsense’s M500/M500L IoT gateway and M700 LoRaWAN gateway are designed to work in real facilities with real obstacles.
They’re built with:
- Strong signal penetration through walls and obstacles
- Flexible placement options (internal or external antennas)
- Reliable 900 MHz or LoRa connectivity
- USA-made reliability you can count on
Even the best products work best when placed right. The best gateway in the world won’t perform well stuck in a corner or closet.
If you have areas that are tough to reach, the i500 repeater can extend coverage. Sometimes you need repeaters in addition to your main gateway. That’s fine, but placement still matters for those, too.
Plumsense also offers the i600 receiver for facilities that need to work with legacy systems or specific wiring setups. Whatever your gateway solution, proper placement is the foundation of success.